We’ve written about deploying and maintaining new applications using AppLife, but what about picking up existing applications that have been deployed over the years? Maybe the application started small, has grown over time but never had a maintenance process built into it. Or maybe it had a maintenance process from the beginning but is no longer working very well. Maybe it’s deployed through XCopy deployment or maybe an MSI installed it. Regardless of circumstance, we’ll show you how to use AppLife to start maintaining that previously deployed application with absolutely no source code integration required.
The Big Picture
In a nutshell, we’re going to use AppLife Manager, which is a Windows Service application that has been or will be installed on your deployed systems, to orchestrate the discovery, delivery, and execution of AppLife packages that will maintain your installed application. For AppLife Manager to perform this maintenance duty, it needs to know where the application is installed and what version is locally present. When AppLife is used in an original deployment, your configuration settings define where and what version gets installed. When picking up an application that has already been deployed through some other method, AppLife just needs to figure out where the application of interest is installed and what version exists there. Once we accomplish this, maintaining the existing application is pretty much the same as any other AppLife maintained application.
We’re going to create an initial AppLife package that will search for the existing application installation and if it finds it, identify what version is present. In the example, we’re using the .Net Assembly version of the primary executable to identify the current version stamp. If the application is not present, we’ll set the version to a value that indicates that the application is not present. That’s all that this first package will do. Then we’ll create another package that installs the current version of the application. At this point, you’ll be able to publish AppLife packages that maintain your deployed application as future versions are created.
Implementing a New Maintenance Process
The first thing we’ll do is create an AppLife Cloud application and configure it as necessary to support the use of AppLife Manager for orchestrating the application maintenance process. You can create a new application through your AppLife Dashboard Subscription view. If you are a new subscriber to AppLife, an application is created for you. To set up the application for maintaining an existing application, we’ll set the Manager Settings like this:
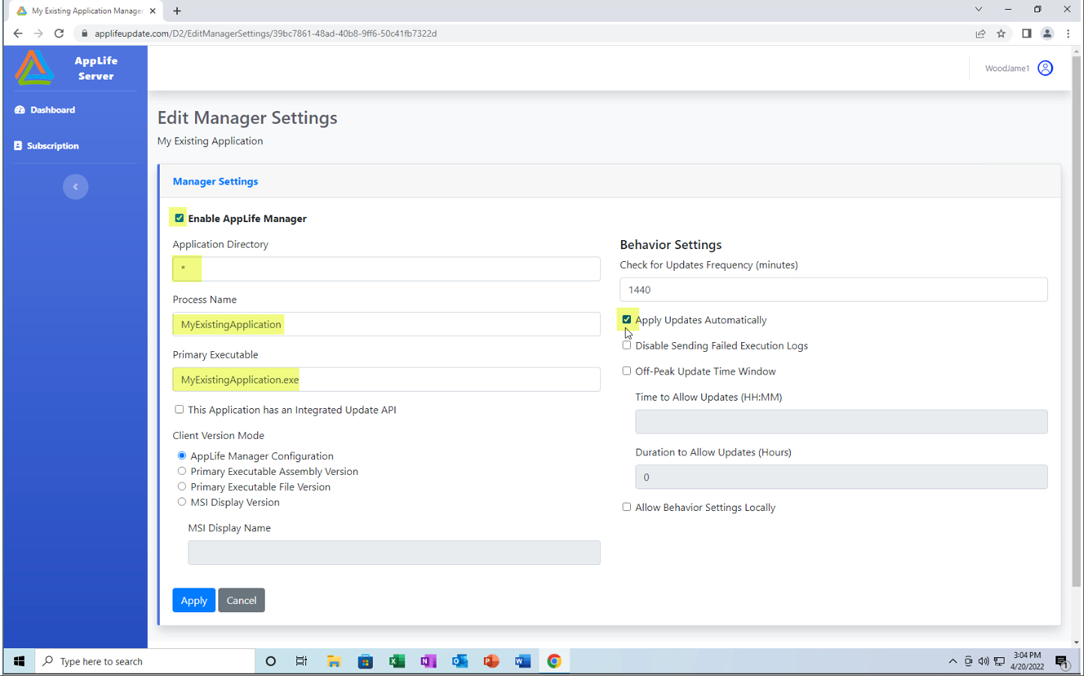
The key setting is the * value for the Application Directory. This instructs AppLife Manager to ignore the server-based setting and rely on an update process to identify the appropriate application directory. We’ll set up that update process in the next step. Here, we’ll also check the box to apply updates automatically and fil in the appropriate process name and primary executable.
Create the Update Package that Searches for Existing Installations
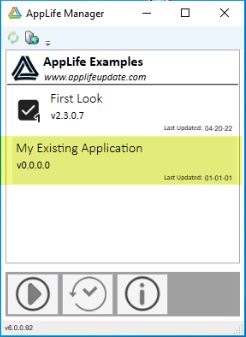
When a new application is created, AppLife Manager sets its version to 0.0.0.0. The plan is to create an initial update package with a version stamp of 0.1 so that when AppLife Manager initiates this application, it will discover only this update package to 0.1. Future updates will target version 0.1 and greater. This 0.1 package will search for the installation that we expect to find and start maintaining. If the application is not found, we’ll assume its not present and we’ll set up a default installation directory that future updates will use to install the application. In any event, after the version 0.1 update package executes, AppLife Manager will know the location and version of the existing application installation and be able to maintain it going forward.
First Action – Set Application Directory
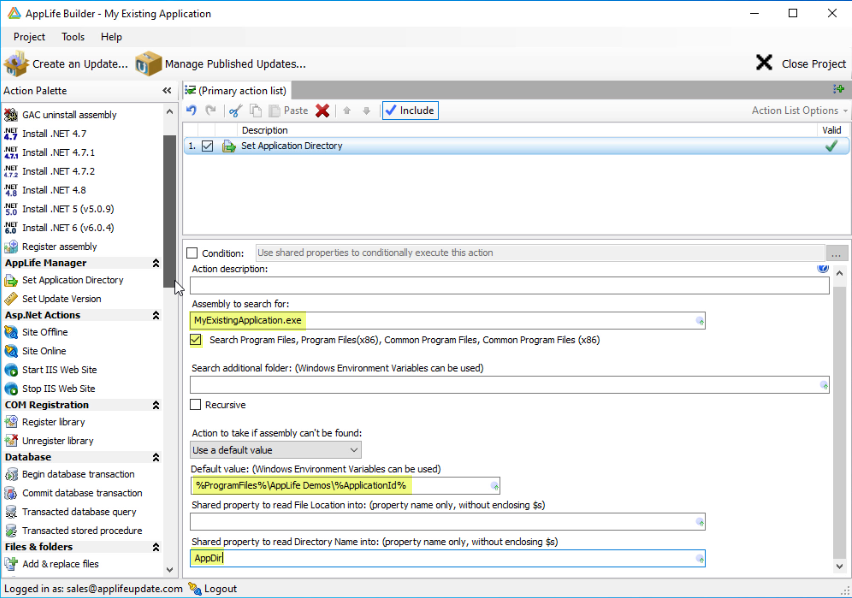
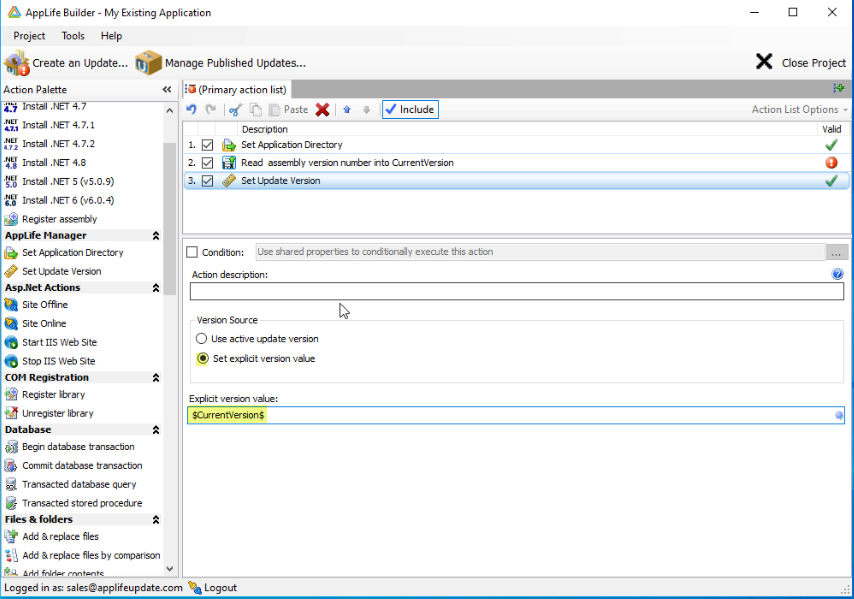
The first action we’ll use is the Set Application Directory action. This action will search the machine for a designated assembly that will identify the current installation directory. The action has some configuration options available and should be configured based on where the existing application is expected to be found. For this example we’ll assume that if we don’t find it in the program files directories it’s not present. We set the assembly’s name that we’re searching for. If the file is not found, we’ll set a default path to be used as this applications installation directory. We’ll use the %ProgramFiles% environment variable. Whatever directory is set will then be placed into a Shared Property that will be used in following actions.
Second Action – Read Version Number
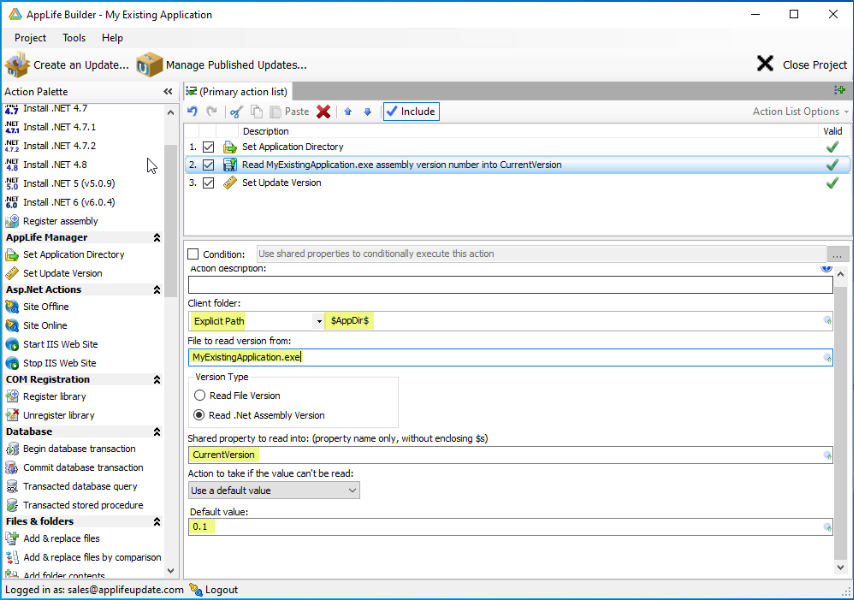
Now that we know where the application is installed, the next step is to determine what application version is installed. This example will use the .Net assembly version, but its possible that determining the existing version might require something else. This action will read the assembly version of the defined assembly, and if the assembly can’t be found, we’ll set a default value of 0.1. The determined version will then be placed in a CurrentVersion Shared Property that will be used in the final action of this update.
Third Action – Set Update Version
The final action will use the CurrentVersion Shared Property to set the AppLife Manager version stamp for the application. Set the action to use an explicit version, and then use the shared property determined in the previous action. When this update gets executed, the version value written here should match the actual version number of the currently installed software.
Create the Update Package that will install the Current Version
For the machines that had the existing software installed, we’re ready to create update packages that will deploy future versions. But for the machines that didn’t have the existing application installed, the next update package should perform a full installation, and target version 0.1 and higher. We’ll create an update package to version 2.0 of My Existing Application. This package will simply package up the entire installation directory and place it in the designated installation directory. Non-trivial applications might require more actions, but just about anything is possible.
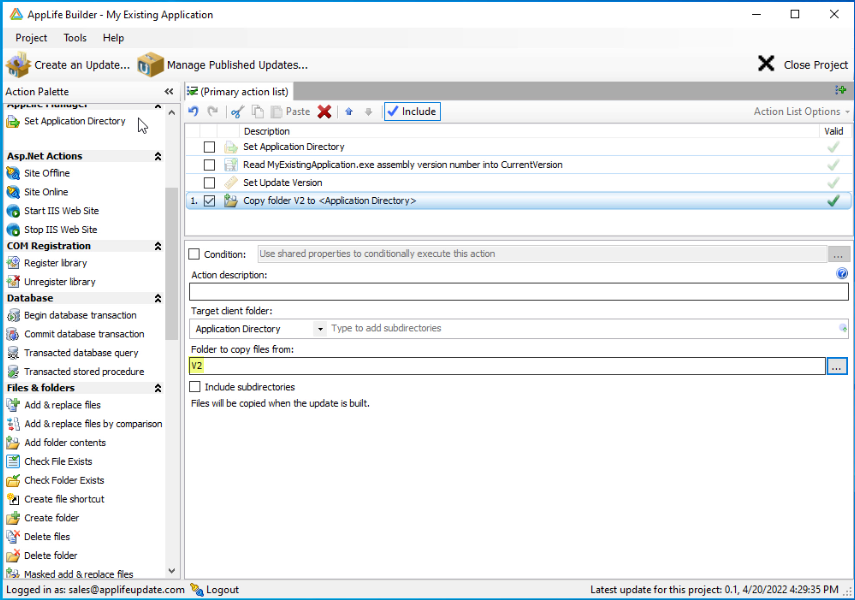
Note that the path to the folder to copy files from is relative to the local working directory that is set up when first creating the application builder profile. The working directory can be changed in the project settings dialog.
This action simply packages every file in the local directory and places them in the defined target client folder when the update is executed. This is the application directory discovered or set in the 0.1 update.
In Conclusion
This is the recommended method to start maintaining an application that is already deployed using AppLife. By using AppLife Manger we avoid any source code integration into the application being maintained. The flexibility that using AppLife packages provides in maintaining deployed software opens the opportunity to use AppLife for application that doesn’t currently have a maintenance process built into it. AppLife Manager needs only be deployed once on deployed clients and once deployed, can maintain many applications.
