AppLife Builder

Controlling Access to AppLife Applications and Packages

AppLife Cloud provides an excellent channel to distribute custom software applications to Windows desktops and servers. For many subscribers, they publish their packages using the default anonymous access settings and it works great for them. But there are many scenarios where it becomes important to filter access to specific applications and packages. The most common scenario is for limiting new versions to testing and QA installations and then opening them up later for wider distribution. Whatever the scenario, when applications require limited access, AppLife Cloud provides a simple method that works well. Our method works like this…

A string token is assigned to each installation, called a Client Access Key (CAK).  Client Access Keys do not have to be unique.  Through your dashboard you can create lists of Client Access Keys.   These lists are assigned to Applications and AppLife Packages which determine their visibility to installations checking for packages.   It’s that simple. In this post, we’ll review how to work with Client Access Keys and Access Lists in AppLife Cloud.

Assigning Client Access Keys

Client Access Keys can be any string value and are specific to the applications domain. While individual installations don’t require unique Client Access Keys, we recommend creating unique keys for each application installation. This not only provides the most flexibility in controlling access to Applications and Packages, but it allows for better monitoring your install base throughout the life of your application within your AppLife online dashboard.
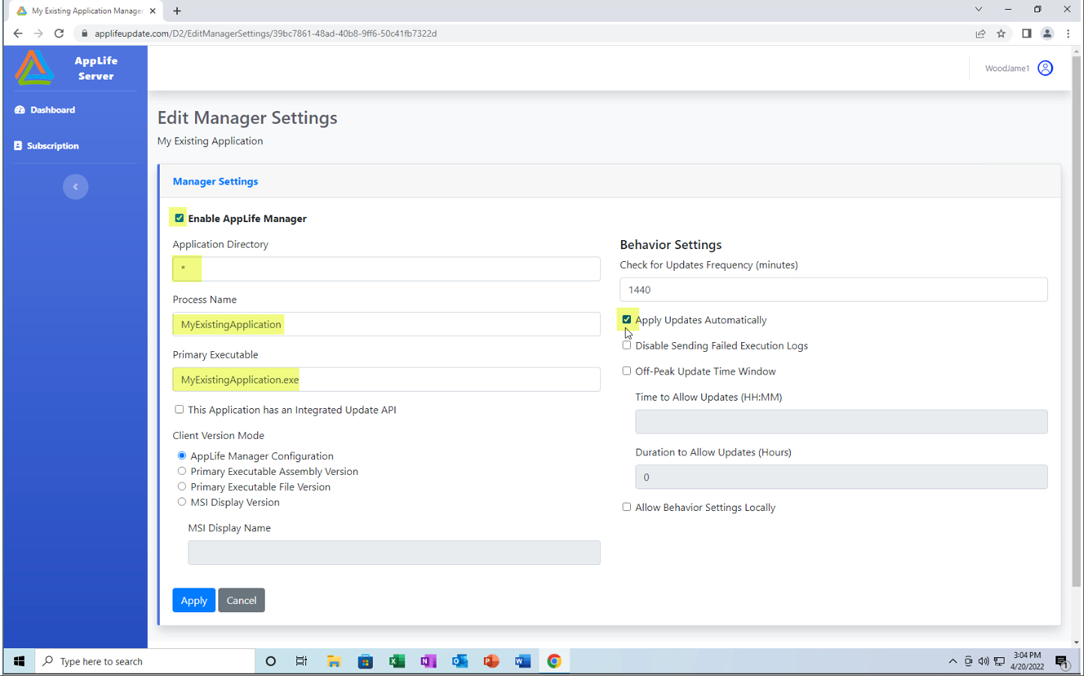
AppLife Manager

When using AppLife Manager on deployed clients, the Client Access Key is set when AppLife Manager is connected (registered) to your AppLife subscription. When installed independently on a computer, the Register Subscription command is used.

Setting Client Access Key through AppLife Manager

When AppLife Manager is installed through automation, a subscription is added through a Command Line Action.

AppLifeManagerInstallDir\AppLife Manager UI\RegisterNewServer.exe  <SubscriptionId> <ClientAccessKey> [<disableAppApprovals>]

Setting Client Access Key through Command Line

AppLife Controller API

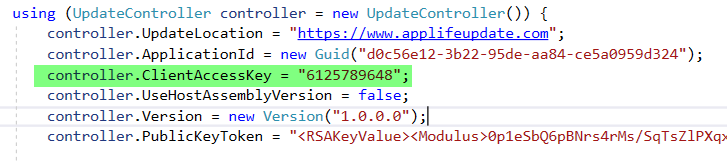
When the AppLife API is used through NuGet to integrate an update process directly into your application, the Client Access Key is set as a property value of the Update Controller object.

Using an Update Controller to set Client Access Key

Creating Access Lists

Access Lists are collections of Client Access Keys that can be assigned to Applications and AppLife packages to control visibility of these assets.

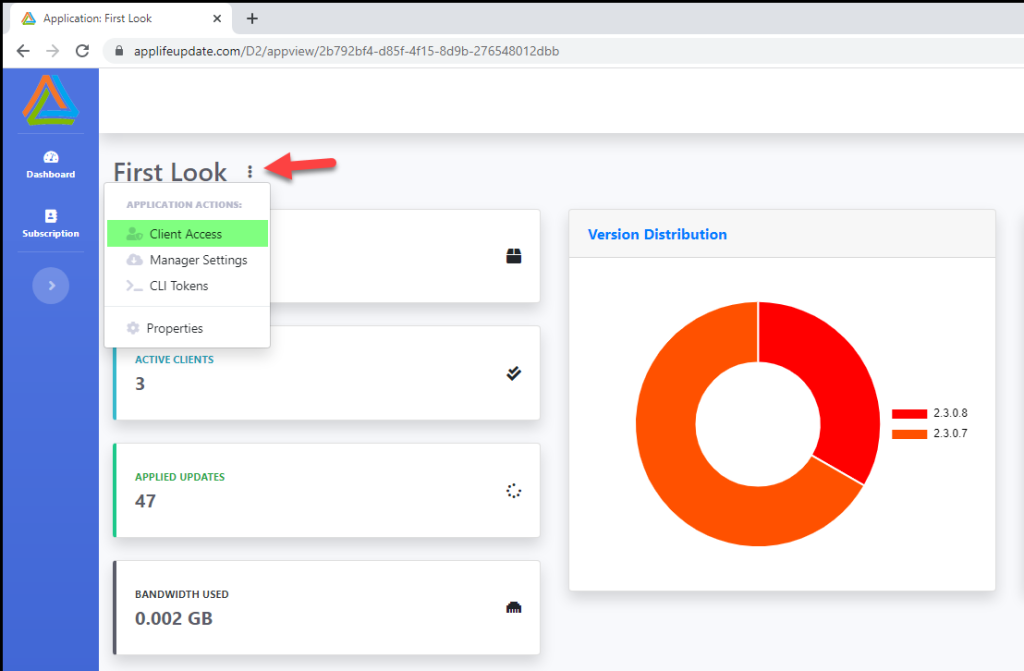
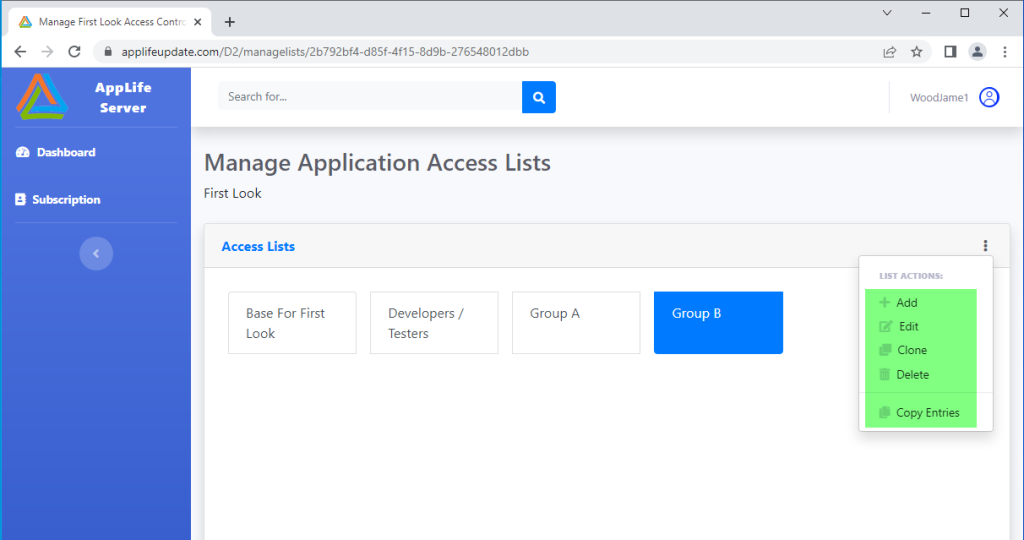
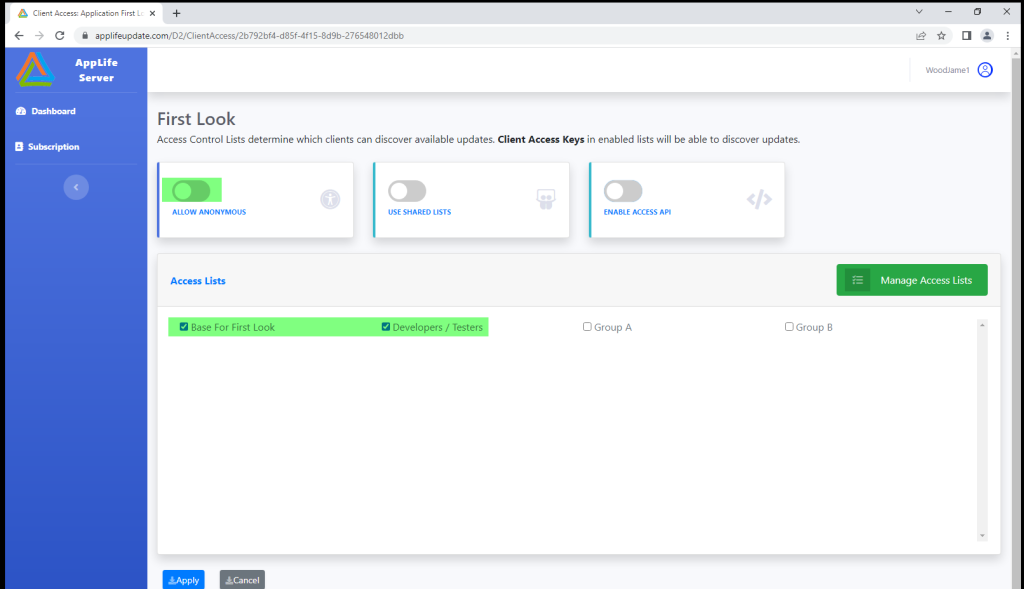
Individual Access Lists are “owned” by an application and the editor is opened through the dashboard Application view.  When viewing any application in your dashboard, the Client Access view can be opened through the Application Menu.

Client Access Menu Option

From there you can control most of the features of Access Control.  Clicking to Manage Access Lists displays all of the applications Access Lists.  By selecting a list, you can edit that list, clone the list into a new one, delete it or copy the entries onto the clipboard.  You can also add a new list from here.

Access List Actions

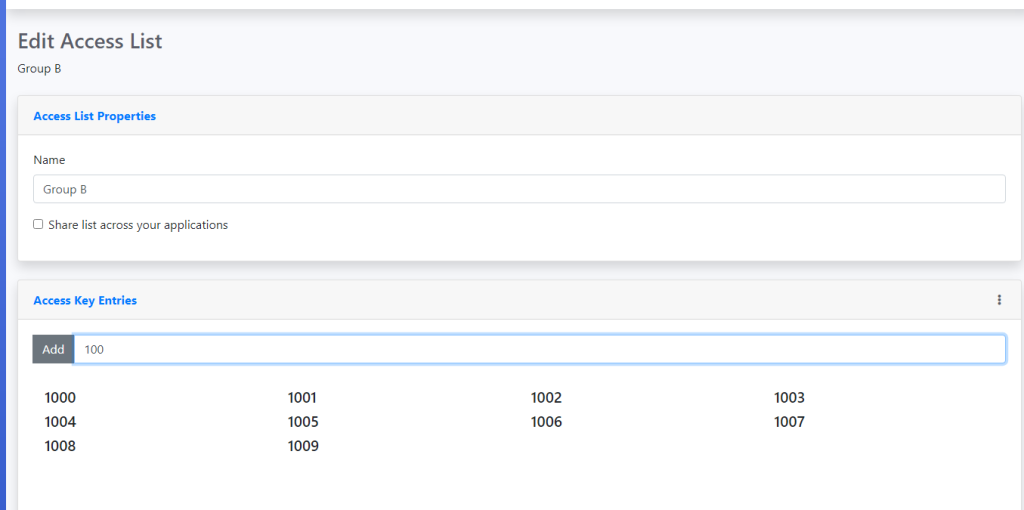
When adding/editing a list, the list name is editable and a list of the Client Access Keys included in the list is displayed.  When adding a Client Access Key, the list of existing keys that don’t match the current entry are hidden from view.  This helps find an existing Client Access Key in a list and also prevents entering duplicates.
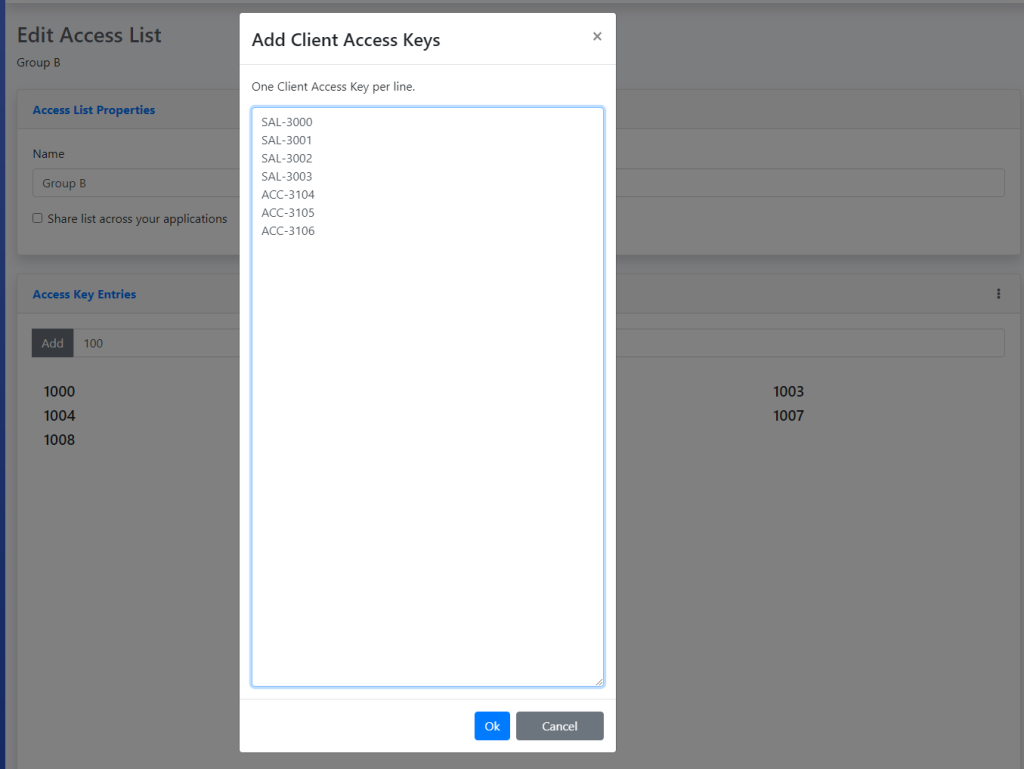
Editing an Access List

Bulk Add

To assist in adding an existing list of Client Access Keys, there is a Bulk Add option.  Using Bulk Add, multiple Client Access Keys can be added at the same time, one per line. This supports using the clipboard to paste from spreadsheets or query results.

Bulk Add Operation

Client Access API

In situations where Client Access Keys are managed from a separate supervisory system, Access Lists can be manipulated through the Client Access API.  This will allow lists to be created, removed and entries added and removed.  To use the Client Access API, it must be enabled per application and a token must be generated.  The different API actions are called through HTTP Post to the respective addresses.  More information is available in the AppLife Cloud documentation.

Sharing Lists

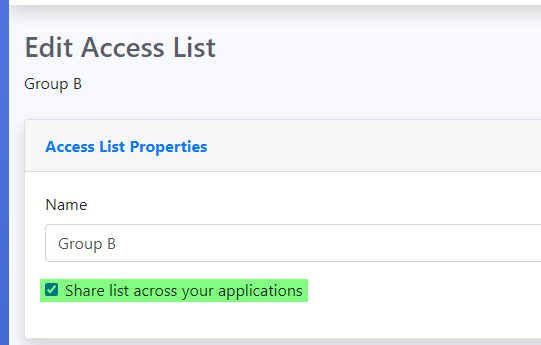
Access Lists are created and maintained for individual applications, however lists can be shared across all applications within an AppLife Subscription.  This allows a single set of lists to be maintained for subscribers with multiple applications that use some or all the same Access Lists.  To share an Access List, the list must be selected as shared.

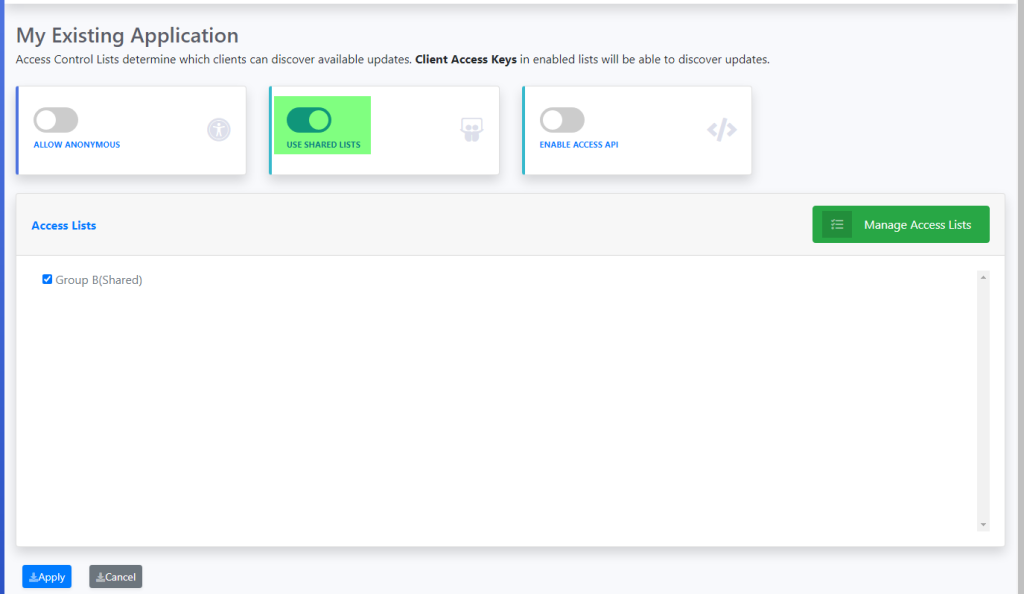
On applications where this shared list is to be used, toggle the option to Use Shared Lists.  Any lists shared through any subscription application will be available for selection.

Share an Access List

Use a Shared List

Assigning Access Lists

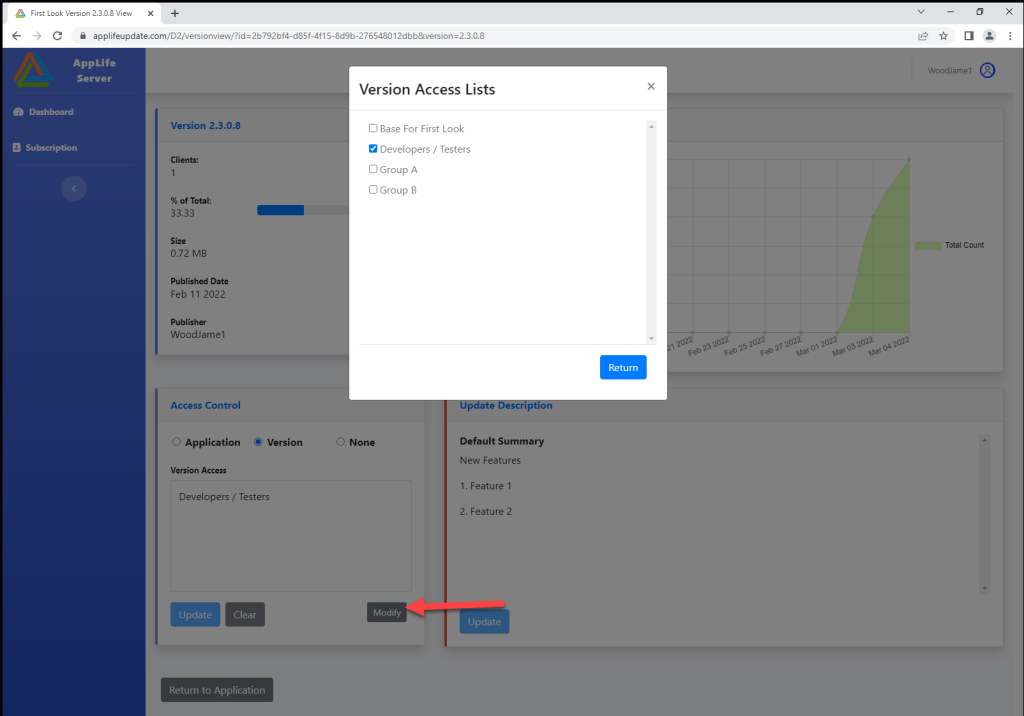
With Access Lists created and shared as necessary, they can be assigned to Applications and Individual AppLife packages to control exposure to clients.  By default, new applications are configured for Anonymous access.  To filter access based on Client Access Keys, disable the Allow Anonymous Access setting, and then check the appropriate access lists that should be able to see the application.

Assigning Access Lists to an Application

Assign Lists to Individual Packages

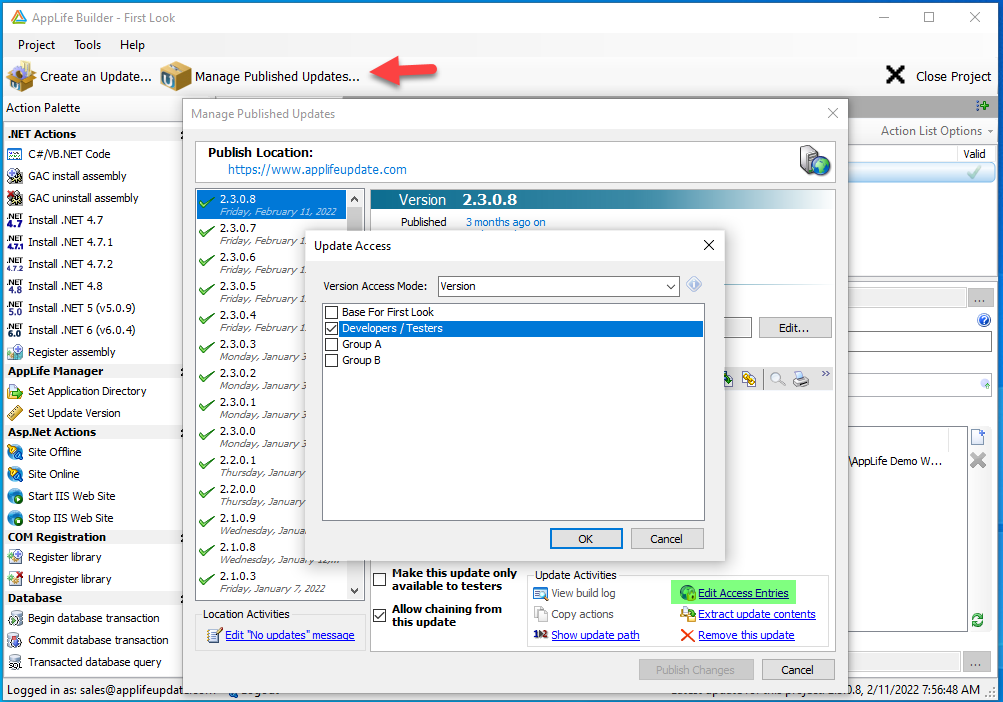
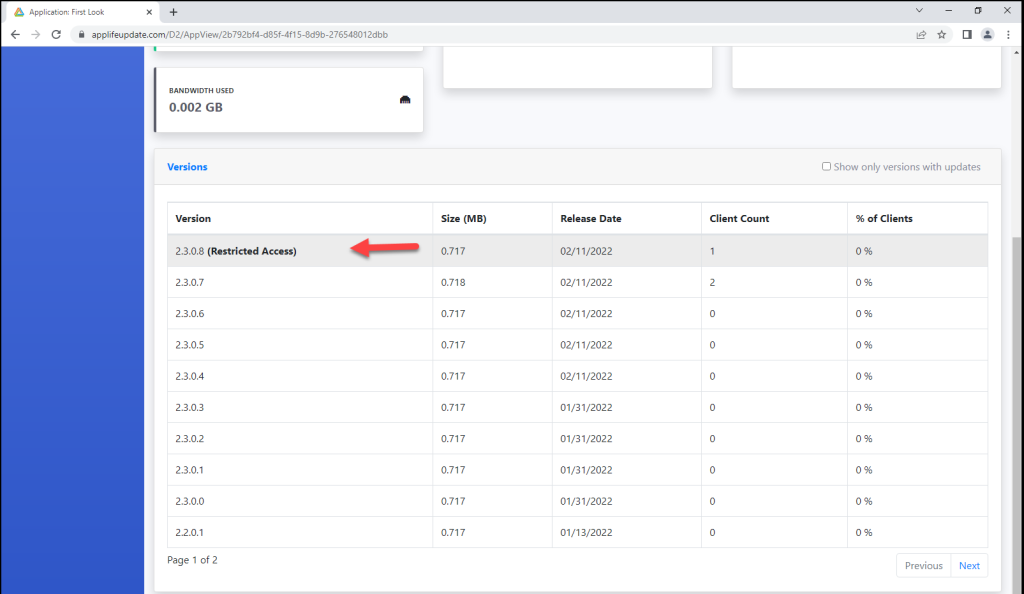
Access to individual AppLife packages can be set during publishing and can be modified afterwards through the dashboard or through the AppLife Builder application.  A common use-case is to publish packages initially for testers, and then open it up for wider distribution through the dashboard later.  When publishing, the Version Access Mode options are Application, Version, and None.  When Version is selected, the Access List selections will override the application level selections.

Set Access Lists when publishing

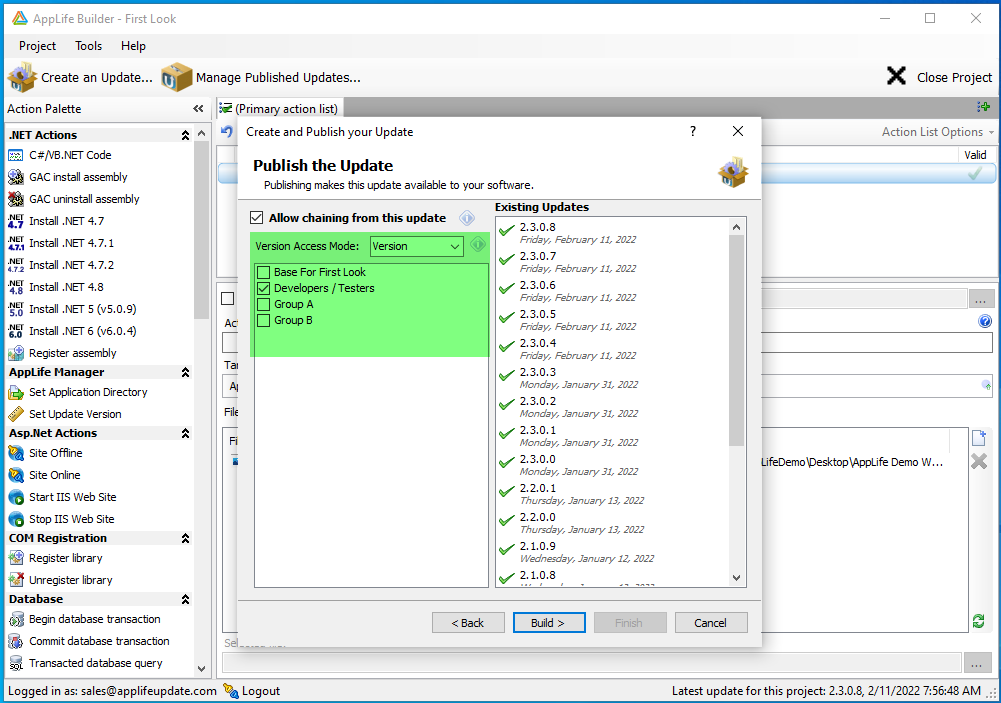
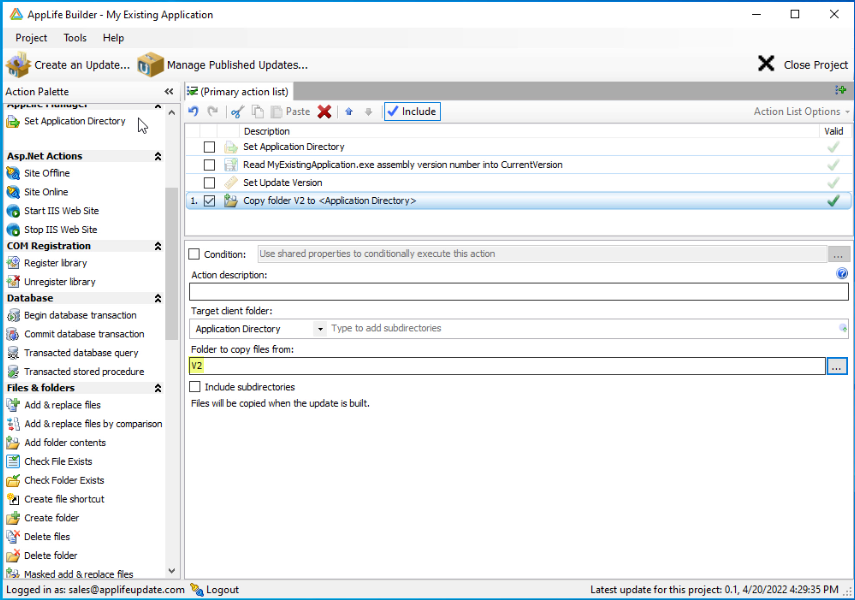
Version Mode Access Entries can also be modified through AppLife Builder.

Modifying Version Access through AppLife Builder

Version Access Lists can also be assigned through the dashboard.  Select to edit the individual AppLife package properties by clicking on the row in the Application Versions table.

Versions Table. Click to Edit.
Modify Version Access List Assignment

Conclusion

Visibility of your Applications and AppLife packages published to your AppLife Cloud can be controlled by setting Client Access Keys on each installation and then assigning lists of your Client Access Keys to your Applications and packages.

The AppLife tooling provides the ability to easily integrate Access Control into your dev ops routine. This article provides instruction on how to accomplish access control using AppLife.

Maintaining a Previously Deployed Application with AppLife

We’ve written about deploying and maintaining new applications using AppLife, but what about picking up existing applications that have been deployed over the years?  Maybe the application started small, has grown over time but never had a maintenance process built into it.  Or maybe it had a maintenance process from the beginning but is no longer working very well.  Maybe it’s deployed through XCopy deployment or maybe an MSI installed it.  Regardless of circumstance, we’ll show you how to use AppLife to start maintaining that previously deployed application with absolutely no source code integration required.

The Big Picture

In a nutshell, we’re going to use AppLife Manager, which is a Windows Service application that has been or will be installed on your deployed systems, to orchestrate the discovery, delivery, and execution of AppLife packages that will maintain your installed application.  For AppLife Manager to perform this maintenance duty, it needs to know where the application is installed and what version is locally present.   When AppLife is used in an original deployment, your configuration settings define where and what version gets installed.  When picking up an application that has already been deployed through some other method, AppLife just needs to figure out where the application of interest is installed and what version exists there. Once we accomplish this, maintaining the existing application is pretty much the same as any other AppLife maintained application.

We’re going to create an initial AppLife package that will search for the existing application installation and if it finds it, identify what version is present.  In the example, we’re using the .Net Assembly version of the primary executable to identify the current version stamp.  If the application is not present, we’ll set the version to a value that indicates that the application is not present.  That’s all that this first package will do.  Then we’ll create another package that installs the current version of the application.  At this point, you’ll be able to publish AppLife packages that maintain your deployed application as future versions are created.

Implementing a New Maintenance Process

The first thing we’ll do is create an AppLife Cloud application and configure it as necessary to support the use of AppLife Manager for orchestrating the application maintenance process.  You can create a new application through your AppLife Dashboard Subscription view.  If you are a new subscriber to AppLife, an application is created for you.  To set up the application for maintaining an existing application, we’ll set the Manager Settings like this:

Manager Settings

The key setting is the * value for the Application Directory.  This instructs AppLife Manager to ignore the server-based setting and rely on an update process to identify the appropriate application directory.  We’ll set up that update process in the next step.  Here, we’ll also check the box to apply updates automatically and fil in the appropriate process name and primary executable.

Create the Update Package that Searches for Existing Installations

When a new application is created, AppLife Manager sets its version to 0.0.0.0.  The plan is to create an initial update package with a version stamp of 0.1 so that when AppLife Manager initiates this application, it will discover only this update package to 0.1.  Future updates will target version 0.1 and greater.  This 0.1 package will search for the installation that we expect to find and start maintaining.  If the application is not found, we’ll assume its not present and we’ll set up a default installation directory that future updates will use to install the application.  In any event, after the version 0.1 update package executes, AppLife Manager will know the location and version of the existing application installation and be able to maintain it going forward.

First Action – Set Application Directory

The first action we’ll use is the Set Application Directory action.  This action will search the machine for a designated assembly that will identify the current installation directory.  The action has some configuration options available and should be configured based on where the existing application is expected to be found.  For this example we’ll assume that if we don’t find it in the program files directories it’s not present.  We set the assembly’s name that we’re searching for.  If the file is not found, we’ll set a default path to be used as this applications installation directory.  We’ll use the %ProgramFiles% environment variable.  Whatever directory is set will then be placed into a Shared Property that will be used in following actions.

Search for Existing Application Directory

Second Action – Read Version Number

Now that we know where the application is installed, the next step is to determine what application version is installed.  This example will use the .Net assembly version, but its possible that determining the existing version might require something else.  This action will read the assembly version of the defined assembly, and if the assembly can’t be found, we’ll set a default value of 0.1.  The determined version will then be placed in a CurrentVersion Shared Property that will be used in the final action of this update.

Read Existing Version Number

Third Action – Set Update Version

The final action will use the CurrentVersion Shared Property to set the AppLife Manager version stamp for the application.  Set the action to use an explicit version, and then use the shared property determined in the previous action.  When this update gets executed, the version value written here should match the actual version number of the currently installed software.

Set the Version Stamp

Create the Update Package that will install the Current Version

For the machines that had the existing software installed, we’re ready to create update packages that will deploy future versions.  But for the machines that didn’t have the existing application installed, the next update package should perform a full installation, and target version 0.1 and higher.  We’ll create an update package to version 2.0 of My Existing Application.  This package will simply package up the entire installation directory and place it in the designated installation directory.  Non-trivial applications might require more actions, but just about anything is possible.

Install the Latest Version

Note that the path to the folder to copy files from is relative to the local working directory that is set up when first creating the application builder profile. The working directory can be changed in the project settings dialog.

This action simply packages every file in the local directory and places them in the defined target client folder when the update is executed.  This is the application directory discovered or set in the 0.1 update.

In Conclusion

This is the recommended method to start maintaining an application that is already deployed using AppLife.  By using AppLife Manger we avoid any source code integration into the application being maintained. The flexibility that using AppLife packages provides in maintaining deployed software opens the opportunity to use AppLife for application that doesn’t currently have a maintenance process built into it.  AppLife Manager needs only be deployed once on deployed clients and once deployed, can maintain many applications. 

Application Master Passcode

When a deployed application discovers and downloads an AppLife package, the first action taken is a verification of the package using the Public Key value that is already present on the client and the update package signature that comes with the package. Digital signature validation using asynchronous cryptology. If the downloaded update package fails validation, it is never loaded or executed. There are many reasons why a downloaded update package might fail validation, but whatever the reason, a failed validation means that the update package is not identical to the package that was built and published by the author.

Validation ensures that the package that is about to be applied on a deployed client is the exact package that was created and published. The validity of the authentication process performed by AppLife is completely dependent on the sanctity of the project’s private key. This validation process ensures that it is not possible for a third party to create a package that could ever be applied through your software.

So if your AppLife Cloud account was compromised, would your application private keys be at risk? Yes they would, and this could potentially lead to a third party having the ability publish a privileged update package that your deployed clients would apply. Securing your AppLife Cloud account through strong passwords, two-factor authentication, and Publishing IP Address Filtering significantly reduces the probability of a compromised account. Beyond these, another action that can be taken to secure your deployed clients is to implement a Master Passcode on your individual applications.

A master passcode is added to your application locally through AppLife Builder. Navigate to your project settings dialog and open the Security tab. When a master passcode is provided, AppLife Builder uses the code to encrypt the application keypair before transmitting application data to the AppLife Cloud. The master pass code is never transmitted and only stored locally if elected to be.

If a unique passcode is applied to your application, the passcode is never transmitted and an update for the application can never be created without it.

A master passcode provides maximum protection against a compromised AppLife Cloud account, as a final secret that is required but never shared. With this protection comes the reality that a master passcode can never be recovered if forgotten. If a master passcode is forgotten, your deployed clients are forever disconnected from the remote update capabilities provided by AppLife.

For maximum protection from your update process ever being used to compromise your deployed clients, choose and implement a unique strong master passcode.

Scroll to Top