AppLife provides the ability to easily deploy and maintain many applications on your Windows clients and servers. By installing AppLife Manager on your deployed systems a channel is created with which one or more applications can be deployed and maintained using AppLife packages. This is the first of a series of posts that will discuss and demonstrate the use of AppLife tools to deploy software. This series will include:
- Deploying an application with AppLife
Using mostly default settings, we’ll start from a brand new AppLife subscription and deploy a .NET WPF application through AppLife Manager. - Explore Manager Deployment Options
After looking at a default deployment in the first post, we’ll demonstrate the different configuration options available with AppLife Manager. - Explore the AppLife Engine
The deployment package in the first post added two files to the installation directory. In this post, we’ll look at other actions and demonstrate the features of the AppLife Update engine. - Using the Dashboard
The AppLife Dashboard provides the ability to control which of your deployed systems get applications and updates. It can help in troubleshoot defective packages, can identify which clients are running what version of your applications and more. The final post in the series will look at how the dashboard enhances your AppLife deployment model.
Connecting AppLife Manager to your Subscription
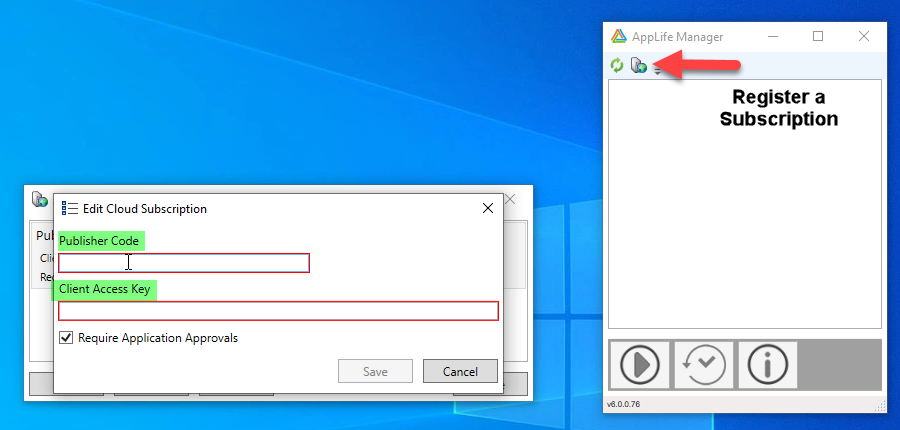
The AppLife Manager application gets installed on all of the systems that will run your software and connects your deployed clients to your AppLife subscription. AppLife Manager is downloaded from AppLife Update home page (www.applifeupdate.com). Once installed, you’ll connect Manager to your subscription through a registration process. To register AppLife Manager, you’ll need your Publisher Code. You’ll also need to define a Client Access Key. The Client Access Key will be a value that identifies an individual client, or perhaps a group of clients.
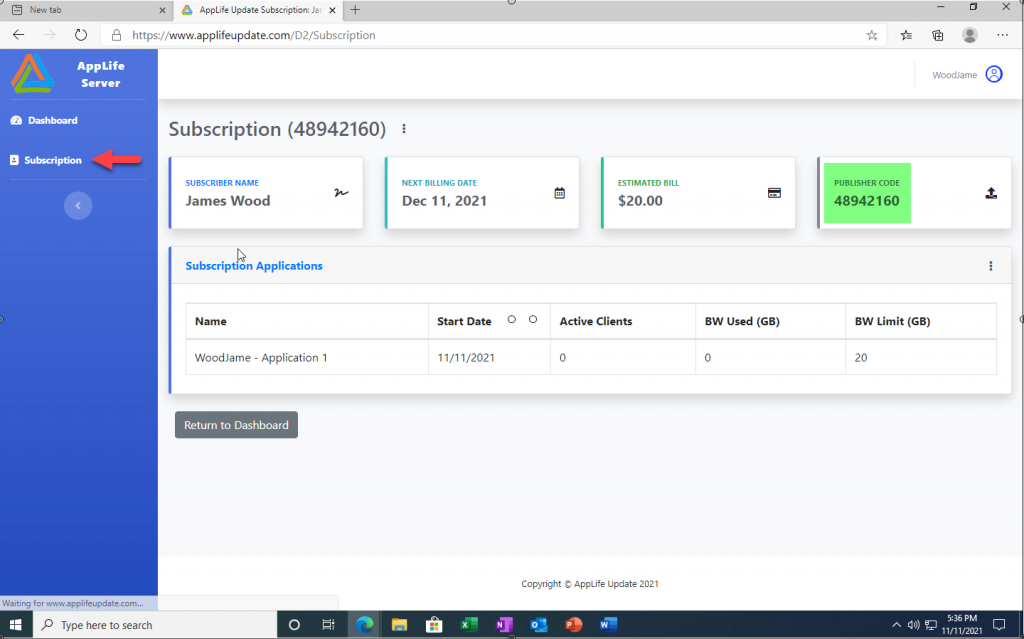
Your publisher code can be found on the Subscription view of your dashboard and can be replaced with a custom value.
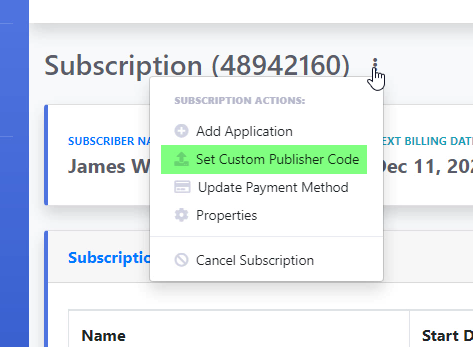
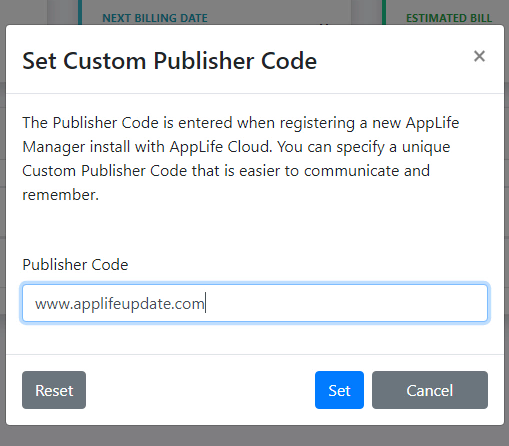
Defining a Custom Publisher Code
You can set a custom publisher code for your subscription. One that is more meaningful and easier to remember, such as your domain name. A custom publisher code is set from the Subscription view on your dashboard.
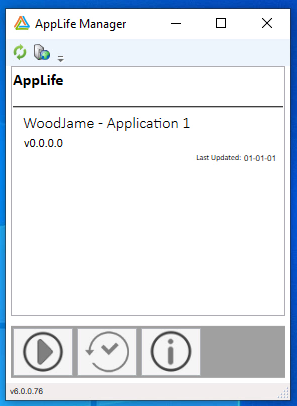
With your publisher code entered, the default settings of your initial application will allow it to be discovered. It’ll be displayed within AppLife Manager. Nothing is actually installed on this deployed client yet, as there are no AppLife packages published for the application.
Deploying an Application
We have an application, called First Look that we want to deploy. We are going to effectively XCopy deploy our First Look application to our client machines through AppLife Manager. To accomplish this, we’ll create and publish an AppLife package that, when executed, will place our application on the deployed client. Once published, AppLife Manager will automatically discover and apply the package.
To create the package, we’ll use the AppLife Builder application. Like AppLife Manager, this can be downloaded from the AppLife Update home page. Once downloaded and installed, log into AppLife using your credentials. Select your subscription application. You’ll be prompted for the basic information about your application.
- Application Name
Set this to your application’s name. In this case, First Look. Note that this will change the name displayed in AppLife Manager. - Executable Name
Set this to the name of the primary executable of your application. FirstLook.exe. - Local Working Directory
This is a local value that defines the local directory for your application and will be used for relative paths later. For custom software, this is usually a bin directory or an output directory of your build process.
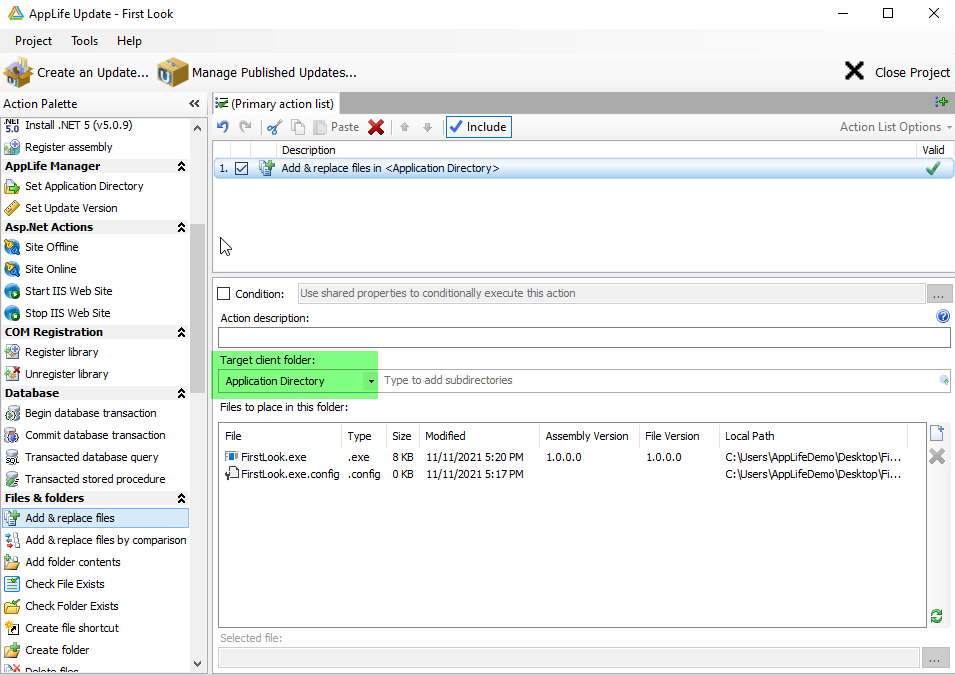
AppLife Actions
An AppLife Package consists of a series of Actions that will take place when the package is executed on a deployed client. There are many actions available. This first package is going to include only one action. An Add & Replace Files action, which will copy two files to the designated Application Directory. When AppLife Manager discovers and applies this package, these two files will be copied.
By default, AppLife Manager applications will check for new versions every 24 hours. After having published this package, any connected clients will install First Look on their next check. AppLife Manager can also be refreshed manually, which will find the application immediately.
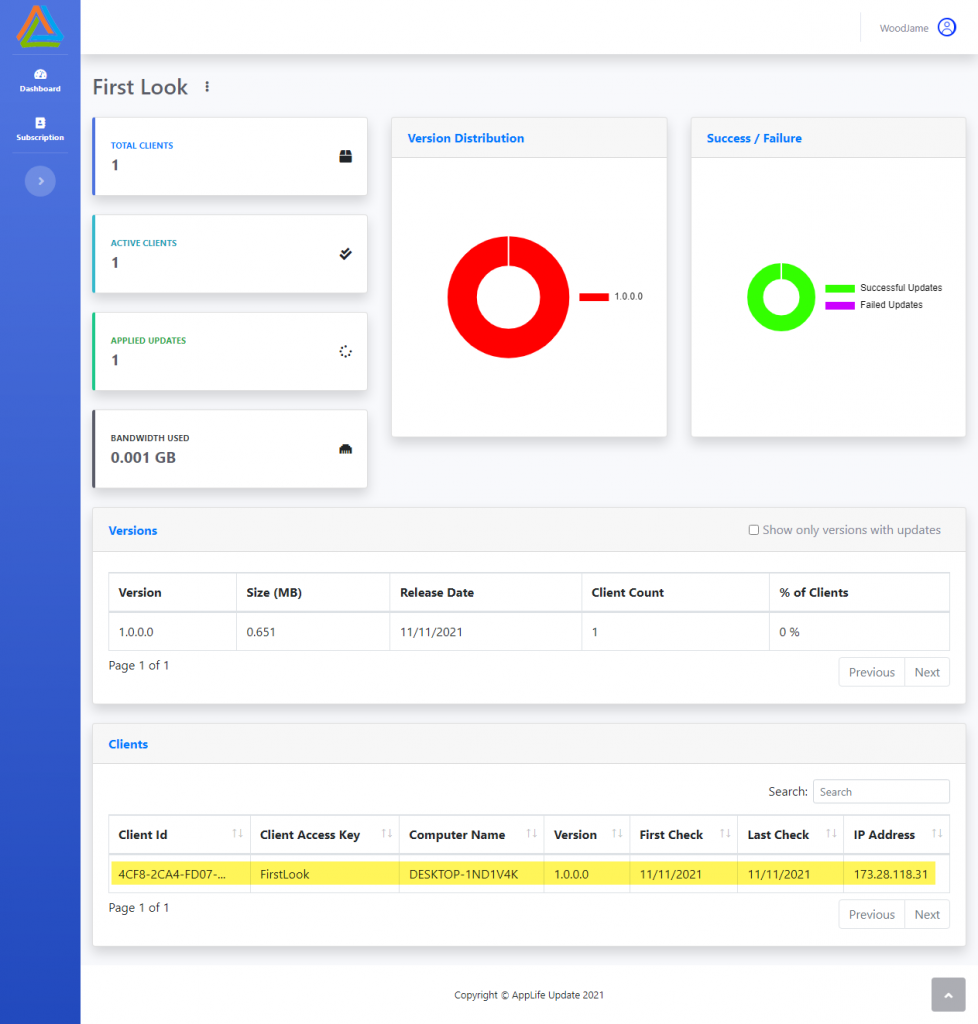
Deployments in the Dashboard
When a client applies an AppLife Package, the results are reported to your dashboard and can be reviewed there.
Summary
Using a new AppLife Subscription, we just built an AppLife Package that deploys our existing application through AppLife Manager. With the exception of setting a custom Publisher Code and changing the application name, we used entirely default settings. In the next post, we’ll explore the configuration options available through AppLife Manager that will let you customize the deployment and maintenance model to better fit different scenarios.