November 2010

Application Updating by File Patching or Replacement

There are many update actions available in AppLife Update to manipulate files on deployed systems during a software update. You’ll see in the list of update actions, that there are actions to replace files, and also actions that patch files and folders. When would you choose a patching action over a replacement action? What’s the difference anyways?

Replacing Files

Update actions that add & replace files will place the complete and intact file into the update package during the update build process, and then as the update package is executed on a deployed client, the intact file is extracted from the update package and replaces the existing previous version.

Patching Files

Actions that patch a file or folder do not place the entire file in an update. Instead, during the update build process a difference file is generated by comparing an earlier revision of a file with the current revision and this difference file is added to the update package. Difference files are often much smaller than a complete file, which results in a significantly smaller update package. As the update is executed on the deployed system, the difference file is combined with the earlier version to reproduce the current version file.

Advantages & Disadvantages

Replacing files makes an update far less dependent on the specific version of the application being updated on the deployed client. For many applications, using replacement file actions allows their update to successfully update any previous version. In this scenario, once a new version update is published, previous updates are no longer necessary and can be removed from the update server.

The advantage of patching files is that update packages can be significantly smaller in physical size.

The disadvantages of both types are converse to their advantages. Replacing files results in much larger update packages. The disadvantage of patching actions is very stringent versioning requirements.

So when would you choose one over the other? Here are a few factors that can contribute to this decision.

1. Are specific file versions reliably present?
If the specific version of a target file cannot be guaranteed based on the installed version number of the application, patching cannot be used. The difference file must be combined with the exact base file used to create it. If that exact file is not present on the deployed system, the new file cannot be created during the update process and the action will fail.  This situation can occur when end users might manipulate the files and assemblies in the application installation directory.

2. If the files to update are physically small, the number of clients to update is small, or network bandwidth is not a concern, consider using file replacement actions.
In general, file replacement actions are more robust due to the lack of specific file versioning requirements. In addition, because updates can target many previous versions, clients that do not regularly update their software as updates are published will apply fewer updates.

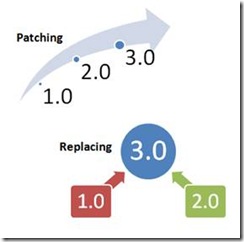
3. To minimize update package size, use patching actions
Applications with many deployed clients, or physically large files should consider using patching actions. A Patch Folder action can operate recursively on an entire folder structure, making it easy to patch the entire application with a single update action. When using patching actions, it is necessary to build your updates to target specific previous versions.

4. Consider combining both patching and replacing
For some applications, certain files can be safely patched while others cannot. Both file action types can be used in a single update.

Wrapping it up, with AppLife Update you have a choice to patch files or replace files during an update. Patching creates much smaller update packages, but requires strict adherence to versioning. Replacing files creates larger update packages but is far more forgiving and allows a single update to target multiple previous versions. So choose the right strategy or your application and start updating!

Build and Publish Software Updates from Visual Studio

So you’ve got AppLife Update integrated into your application. That was easy enough. You’ve got your AppLife Update project set up to build and publish updates from Make Update as you release software versions. To make the process of building your updates even easier, I’ll show you how to integrate update building and publishing directly into your Visual Studio project build process.

AppLife Update ships with an MSBuild task that we can use within a Visual Studio project file to build and publish updates as part of the Visual Studio build process. Using this, we’ll add a new Release with Update build configuration to a Visual Studio project. When this build configuration is chosen, an application update will be built and published as the Visual Studio project builds.

Start by extracting the Simple C# Quick Start project. This will give us a common project to work from.

Step 1 – Create a new build configuration.

From the Visual Studio build menu, select the Configuration Manager.

Create a new build configuration and call it Release with Update. Select to copy settings from the existing Release configuration. We’ll modify the project to build and publish an update when this configuration is built.

Step 2 – Modify the Visual Studio Project File

From the Visual Studio project menu, select to Unload Project. With the project unloaded, you can edit it within Visual Studio by selecting the Simple project node from the Solution Explorer and from the context menu, select to Edit Simple.csproj. With the Visual Studio project file open in the editor, scroll to the bottom and you will see two commented out Target elements. Uncomment the AfterBuild target and add a UsingTask element that references the assembly that houses the BuildUpdate MSBuild task. This assembly is located in the AppLife Update install directory.

Inside the AfterBuild target, add a BuildUpdate task. Set the Condition attribute to execute only when the newly created build configuration is used. Details on the attributes of this task are available in the MSBuildTask ReadMe.rtf file located in the same folder.


Step 3 – Modify the aup project file to use the Release with Update output folder

The Add & Replace files action should look at the Release folder for its files. Add a path relative to the aup project file.

Simple\bin\Release\Simple.exe

That’s it!

Now, whenever you want to publish an update, you can select the Release with Update build configuration and build the project.

Visual Studio Build Output

Parting Thoughts

Build a test update out of Visual Studio, or build to a test update location. Both options are just as easy. This prevents an inadvertent build from being available to end users, and provides a built in updating testing mechanism.

To build a test update, set the TestOnly attribute to true. For clients to see test updates, they must have a specific application setting in their app.config file.

To publish to a specific test update location, you can name the publish location in Make Update project settings, then change the PublishLocations attribute value to match this update location.

Application Updates and Mayhem

Have you seen the Allstate mayhem commercials? They are pretty good. If you haven’t seen them, take a few seconds and watch the video below. At this point, you may be asking yourself what does that have to do with software. But then again if you’ve been around awhile, you may not be… These spots have a lot in common with software because in software, mayhem is everywhere.

As a software developer, if you are not finding bugs, you’re fixing them. Mayhem. As a user, unexpected behaviors often occur as you go about using the software you use. Mayhem. And as an administrator, you spend a lot of time working around unexpected issues. Mayhem.

And so it is with maintaining deployed applications, or automatic application updating. In a perfect world, an application update would never fail. Most don’t. And most houses don’t catch fire either, yet we buy insurance just in case. Around here, we put a lot of effort into ensuring that when a software update is applied, one of two outcomes will result. A successful update, or a complete rollback. We prefer the former, but plan for the later. And for most actions rolling back, and preparing for the rollback that hopefully will never occur, requires more development work than the execution of the action. Let’s look at files. Protection from mayhem is almost all of the work involved in file actions. The first thing we do is verify that our update process has permissions to replace the file. If we don’t, there is no sense in proceeding. We can stop before doing anything, preventing mayhem. Then we back up the file, including the assigned permissions, just in case mayhem happens later on, we can restore the original file. Such is the case with all of the built-in updating actions. With the exception of the Install .Net 4.0 Framework action, they either complete their work or rollback completely. For that action, mayhem is better avoided by leaving the framework successfully installed than to remove it during a rollback.

Our Adjuster

When mayhem happens, insurance companies like Allstate will send out an adjuster to determine the cause and extent of the damage. Our adjuster equivalent is the update action log files. When mayhem occurs, there are few things worse than having to tell your boss, “I don’t know why that happened”, because that means you also don’t know the answer to the inevitable next question. “How are we going to prevent it from happening again?” Update action logs tells the story of what happened (or didn’t happen) during an update, and with an update log you’ll know what happened and be able to determine how to prevent it from happening again.

If your house burns down, we can’t help much. Hopefully you have Allstate for that. But for protecting your software updates from mayhem, look to AppLife Update. You’ll be in good hands.

Scroll to Top