So you’ve got AppLife Update integrated into your application. That was easy enough. You’ve got your AppLife Update project set up to build and publish updates from Make Update as you release software versions. To make the process of building your updates even easier, I’ll show you how to integrate update building and publishing directly into your Visual Studio project build process.
AppLife Update ships with an MSBuild task that we can use within a Visual Studio project file to build and publish updates as part of the Visual Studio build process. Using this, we’ll add a new Release with Update build configuration to a Visual Studio project. When this build configuration is chosen, an application update will be built and published as the Visual Studio project builds.
Start by extracting the Simple C# Quick Start project. This will give us a common project to work from.
Step 1 – Create a new build configuration.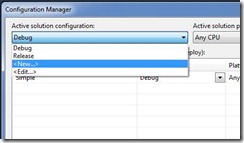
From the Visual Studio build menu, select the Configuration Manager.
Create a new build configuration and call it Release with Update. Select to copy settings from the existing Release configuration. We’ll modify the project to build and publish an update when this configuration is built.
Step 2 – Modify the Visual Studio Project File
From the Visual Studio project menu, select to Unload Project. With the project unloaded, you can edit it within Visual Studio by selecting the Simple project node from the Solution Explorer and from the context menu, select to Edit Simple.csproj. With the Visual Studio project file open in the editor, scroll to the bottom and you will see two commented out Target elements. Uncomment the AfterBuild target and add a UsingTask element that references the assembly that houses the BuildUpdate MSBuild task. This assembly is located in the AppLife Update install directory.
Inside the AfterBuild target, add a BuildUpdate task. Set the Condition attribute to execute only when the newly created build configuration is used. Details on the attributes of this task are available in the MSBuildTask ReadMe.rtf file located in the same folder.
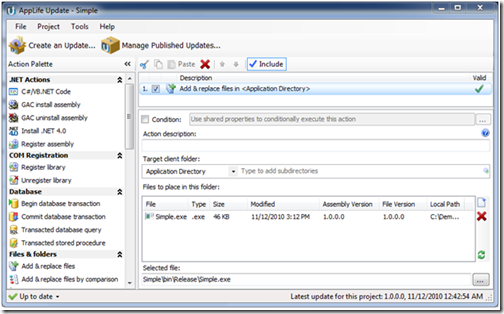
Step 3 – Modify the aup project file to use the Release with Update output folder
The Add & Replace files action should look at the Release folder for its files. Add a path relative to the aup project file.
Simple\bin\Release\Simple.exe
That’s it!
Now, whenever you want to publish an update, you can select the Release with Update build configuration and build the project.
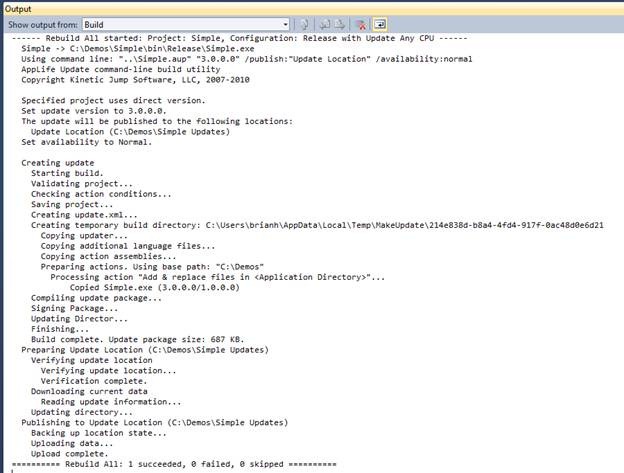
Visual Studio Build Output
Parting Thoughts
Build a test update out of Visual Studio, or build to a test update location. Both options are just as easy. This prevents an inadvertent build from being available to end users, and provides a built in updating testing mechanism.
To build a test update, set the TestOnly attribute to true. For clients to see test updates, they must have a specific application setting in their app.config file.
To publish to a specific test update location, you can name the publish location in Make Update project settings, then change the PublishLocations attribute value to match this update location.